THE FORMATION OF SOMETHING NEW
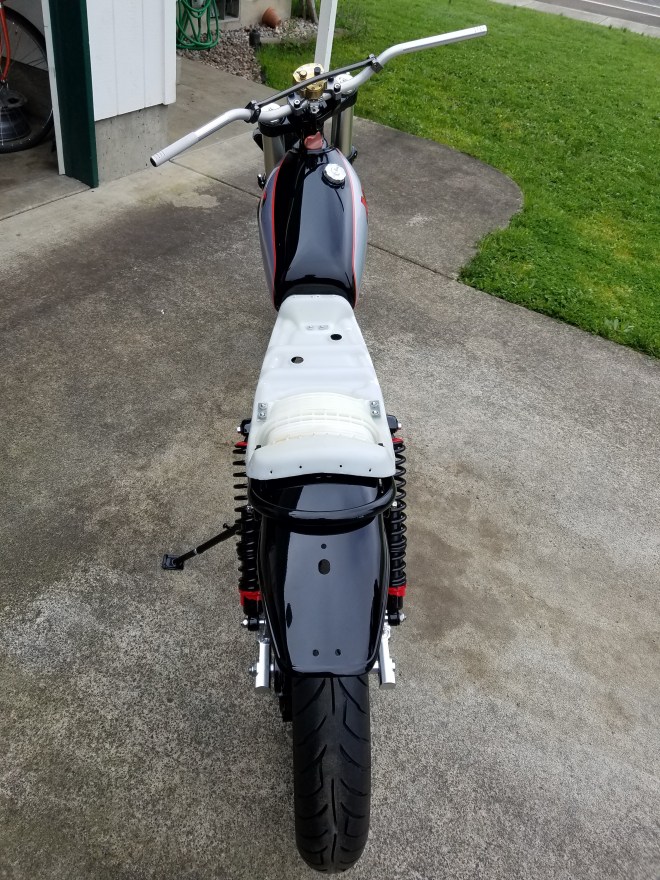
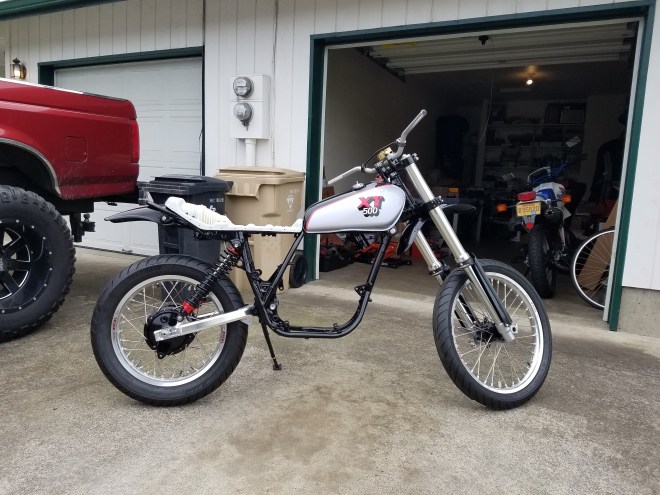
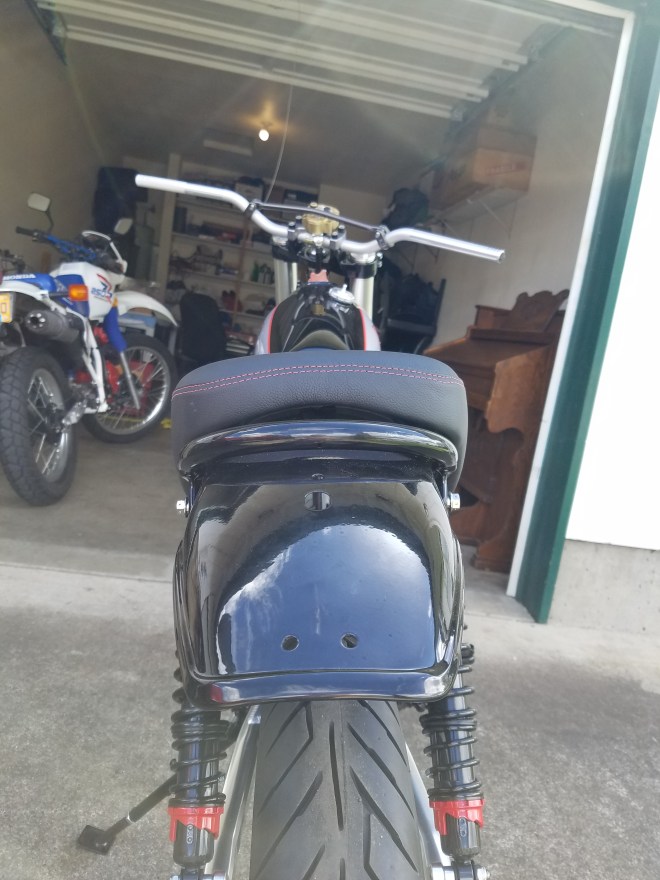
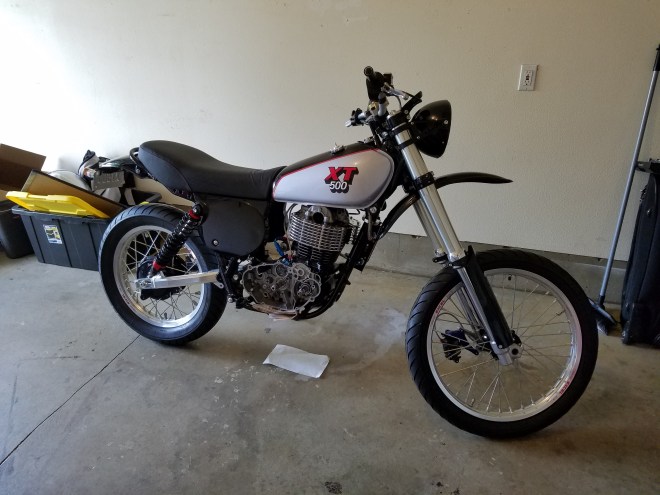
It is now time for this work of art to extend some sense of completion to the entirety of the motorcycle. I needn’t say more, though will share that in this form, the tail view is by far the most appealing to me, likely in the sense that it almost looks complete.
From one day to another, with one weather type clashed in difference with another. A sunny, dry day is upon us, and the availability to borrow another vehicle for transporting. What is rich here, is that in the amount of time it took for me to secure the ratchet straps I could have probably walked the bike to its next location. One of the last items that needed to be done outside my efforts was the building and finishing of the seat, just a few blocks from my residence. Mr Eds Moto is the location as previously mentioned, having been a source for tire mounting and balancing previously.
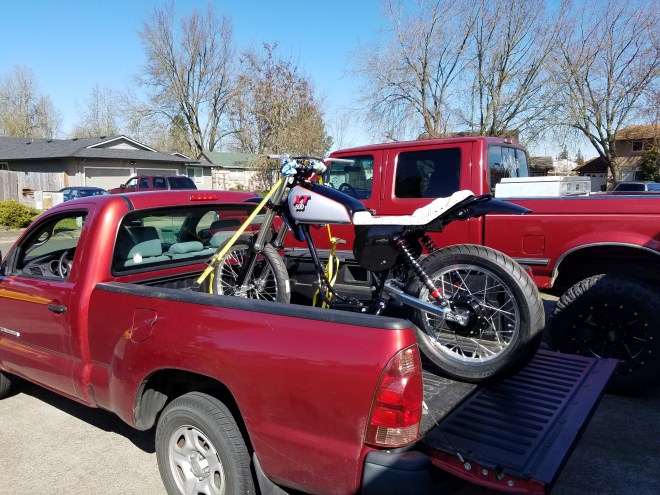
One last delivery of items before the onset of another milestone. Strangely enough, however, the reception of these items should be the last interactions with both of the fine businesses and individuals that supplied them, which at this point couldn’t be forgotten.


Time now for another pause, perhaps the last such request until the completion of all of this, not just assembly but testing and recognition as well. Also, after too many hours permanently planting my imprint on the couch, the writing is on par and up to the current with the actual project. From here I hope to provide a better sense of vigor and excitement, possibly a more consistent style, though that is unlikely to occur. So long as the information is presented and available, my mind will lay at rest in earnest, at least towards this piece of my life. On the project itself, I await patiently for the seat to be completed, though this will be arguably rapid in actuality. Much more concerning is the head, it is yet to have left our hands while waiting for assurance from the individual who is to perform such work, which I can share old papers and documents on when we get there. Otherwise, the entire project should be able to be completed in house, or garage rather, a full and detailed assembly, a small amount of painting, countless hours of wiring, creation of various fluid lines, and many other small items that escape my mind. Lastly, most needed items as purchases should exist in our presence, though this brings a smile to my face as I know this is not quite so, but close nonetheless.
While awaiting completion of the seat, and secondly the rolling assembly itself, there is one obstacle that can be finished thankfully. The two crankcase halves once again can be mated together, and appreciated for the true simplicity that lies inside. Though simplicity comes to those who don’t need to rebuild the transmission shafts themselves, which would likely be a much dreaded task. That concern aside, the counter shaft and input shaft lay fully assembled and shimmed in place along with the shifter drum and two fork selector shafts, the crankshaft itself, two dowel pins and one spacer, one o-ring, and lastly Yamabond sealer. Along with this, a new gasket for the oil pump backing plate, which has been converted joyously with Allen bolts, and a short stay in the oven for the right crankcase half. In heating the case prior to installation there is enough tolerance in the bearings to glide the crankcase half into position without needing the crank puller. Already having failed my purchasing hopes from the previous writing, a full stainless steel engine dress kit was needed as I had previously failed to account for this. A small purchase however, and adds more contrast that if kept clean will suffice more so than the flat and faded black originals, though they have been indispensable throughout the build process. Also needing mention, are the two upgrades within this work, the output seal retaining bolts and the Kedo high pressure oil pump. While you can’t see the washers themselves on the output seal, they lay over the lip of the seal itself and hold it securely in place, a fairly simple fix, though only if you were going to be at such a stage anyway. As for the Kedo pump, a simple cleaning and oiling of the scavenge rotor and shaft along with the installation of the pressure pump side and final installation is simple enough. The kit also comes supplied with new bolts, and recommends to upgrade to a 5 bolt rotor housing over the 3 bolt style found in earlier models. Part number 583-13316-02-00 and is readily available brand new.
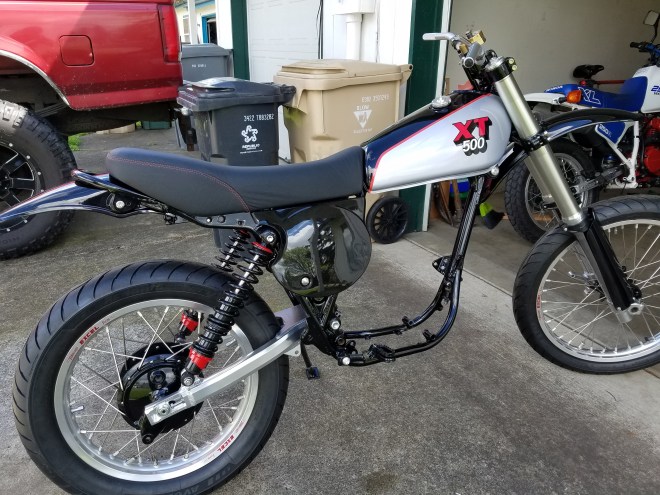
The project as a whole can now continue, the seat is complete and the rolling assembly is home once again. Concerning the seat itself, I couldn’t be more pleased with the results. It is so incredibly simple even in comparison to the original, yet extends the natural curvature of the tank though the seat and towards the rear of the bike unlike the heaping mass that the original shape held. Also, the simple addition of stitching that also extends through the side covers adds another flavoring of design and character. Perhaps the most enjoyable aspect of all is that aside from the leather covering itself, the seat is fully refurbished from the original materials. The seat pan as seen previously, the hangers now coated in paint, the seat foam itself simply shaped as desired with a thin layer of new padding sandwiched between the new leather. All this, and a far too agreeable price point in my opinion and needing mention and thanks, Mr Eds Moto, staying busy just on custom seats alone, something I wouldn’t have expected in our area, but delighted in now knowing.
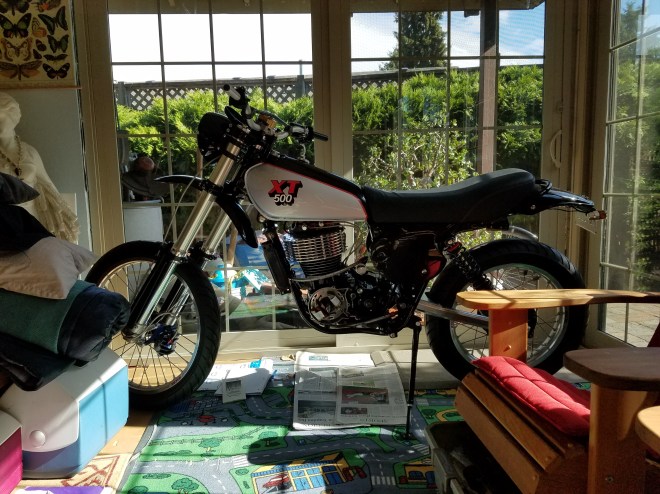
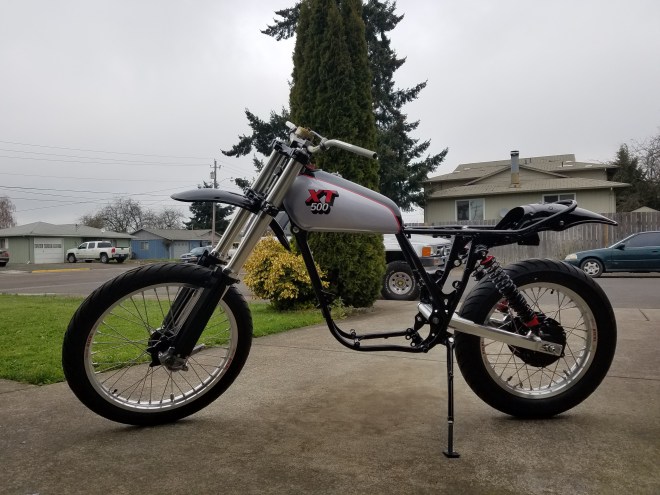
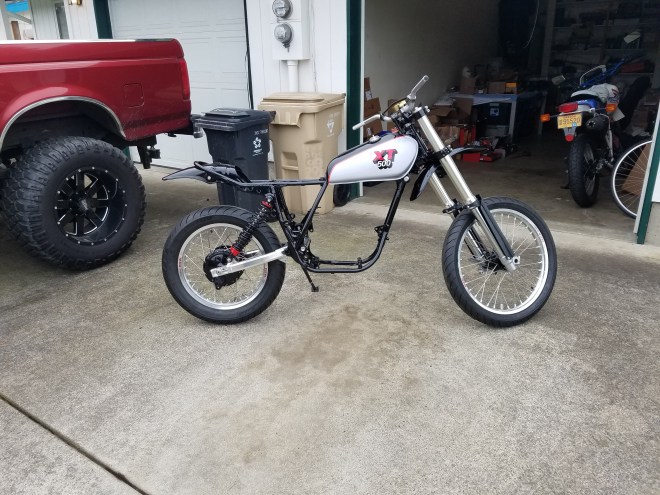
The basic construction of the motorcycle when the thumping single is off on vacation. In over glorification, this is about as useful as a bicycle at this stage, perhaps even less so as this provides no propulsion aside from rolling uncontrollably. Though, the visual addition that this adds to any venue is unquestionable, so enjoy as we approach further towards the end goal.
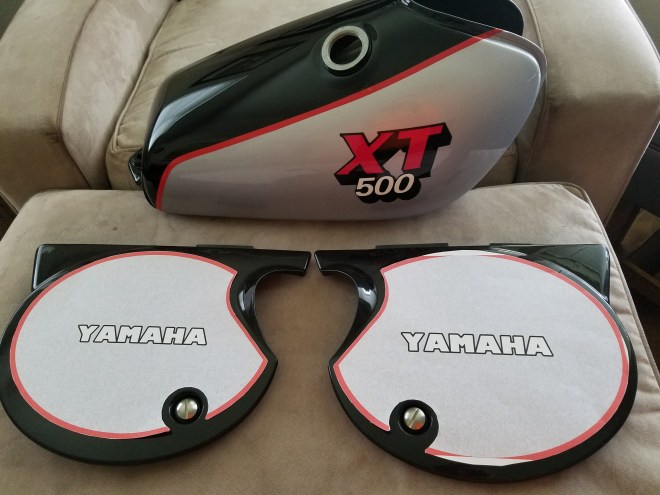
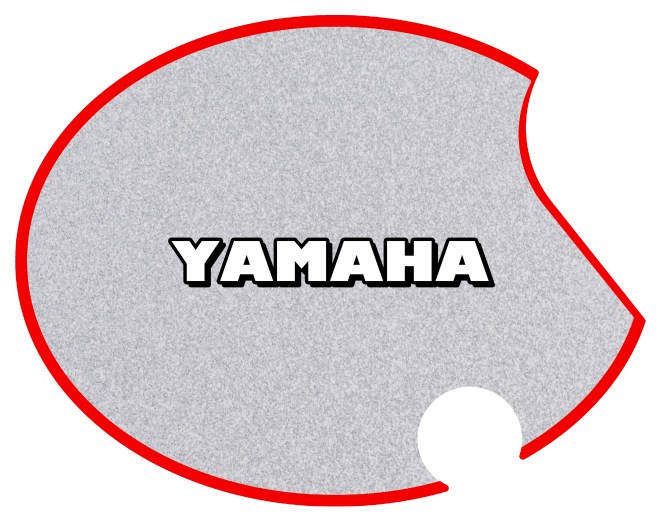
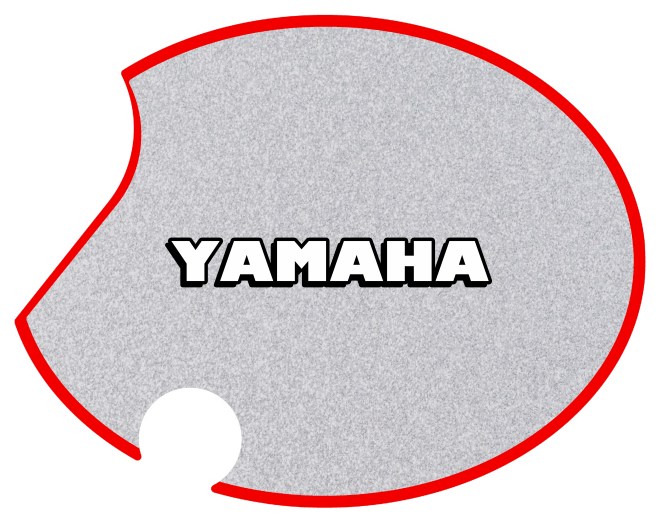
More unnecessary, but wholly welcomed design influence. My hope from early on was either to leave the new black side covers as is, or design covers that match the overall theme of the tank. So, here is my best attempt towards that. Now, it first needs to be mentioned that there are different shapes to these side covers and models. To simplify, although any of styles will mount to any other, the difference comes with the expansion chamber within the exhaust. If the expansion chamber is present, the straight edge style needs to be used and can be seen in the pictures on the reman style decals. Since we will be having no such concern, our side cover style is mirrored on each side and the same shape. After this, many modifications from stock decal renderings within Photoshop for more than a few hours yielded these results. While I await for the actual vinyl copies to be made, the design influence is clear. The process, while exacting, was doable and understandable once complete. Layering of red, silver, and metallic texture makes the base with the shaping outline, along with raised lettering. Hopefully the final copies come closer to what is seen behind the mask of a computer screen, but thats all part of the adventure and allure of the process. Perhaps if there was interest in making these for your own project arrangements could be made, or just friendly guidance.

Further investigations towards the printing of the side cover decals would reveal an unexpected hurdle, copyright concerns. At the moment, the printing outfit that I contacted to make these is waiting for a response from Mr. Yamaha if you will, as to the ability to create these for my project, even if it is my sole use. So, a written request sails to their destination, awaiting approval and the portray of the build in whole. While there is much more to do, I dearly hope that interest is sparked with individuals who work in the same company that constructed this machine over 40 years prior. In the meantime, as life is bringing more changes, and I take more calculated risks in life than I previously ever have, I confess the project will slow, but the final vision when complete will be worth all consequence. One rather small investment of time, however, will complete a much required task of both function and decore, with small aspects of contrast that add more than the sum of their own visual concerns. It is time to construct the AN hydraulic lines for the transmission of oil and brake fluids, and visual pleasure. The process is simple enough, measure the required distance, mark and cut square the stainless steel braided line, and carefully apply the fittings together with light lubrication and steady hands trying not to mar the fittings. A final requirement it to pressure test your work, a sense of tooling I don’t currently have, but will note closely on the smaller -3 hoses that will carry some positive pressures.
While the lines aren’t fully dressed with line separators and holding tabs, and more clearancing near the sprocket cover is required, they are made, which is quite satisfying in comparison to the next less glamorous task. Though, it will consist of understandable troubleshooting and diligent attention, electrical wiring rough in and finishing. It will start simply enough, running down an extensive laundry list of many exacting wire extension and connections, nearly all following the formula; wire cutting, wire striping, dielectric grease, crimping, shrink wrap, and lastly electrical tape. Now, that recipe doesn’t call for measuring amounts of needed wire and the connectors required to make everything work together, but be assured that such concerns were accounted for in advance, it was time to start making things again. My hope was to start from the tail section and then make my way forward finishing with the headlight. Instead, what would really be the case is which tasks could first be dealt with that were truly simpler, or at least couldn’t be tested until the bike was actually running. So, in this first gallery many wires found a pathway to the components that have long been lonely disconnected from other members of the electrical family. Here, the taillight, capacitor, indicator relay, and kill switch become connected with the grid.


A quick reference to some of the old, and with happy acceptance that some of this old equipment will live on in this otherwise new machine. The headlight extension wire is rather useful first in the sense that it already works and the terminals have no corrosion, but that I don’t have to allocate a double female terminal, since power either goes through to the headlight, or sent to ground in this terminal. The key switch will also live on, in keeping with the same key for itself, the steering lock, and toolbox. Though, when taking apart the switch the plastic backing broke in half, and would require some epoxy to affix again. Still on the switch, the inability to place atop the upper tree and decision to place on the downtube would create the ailment that the connector would miserably fail to reach its matching terminal in the harness. In keeping with using some of the old, an excellent use of the original harness would come to be.
Now, as if it didn’t appear that I was having enough fun with this project, and believe me I desperately want to see this done and go for a ride, more excitement was to come the very next day, moving time. What is simply no more than a rental garage, measuring smaller than 10×20, would be the area where most of the design and work would occur, along with the overall evolution that this motorcycle has gone through, and of direct consequence many good memories. I give to you some of the final pictures in this space of this machine, knowing that the real destination as it were, has still not been reached.


A disappearing garage brings light upon a fascinating creation, or perhaps this machine shines a fair bit brighter in the absence of other material things.
A familiar sight with familiar machines. This little Toyota pickup has served of great value from my friend and now no longer roommate, and that is without my affinity for Toyota included.
One aspect that I couldn’t accurately account, was the movement of this machine to its new, and also old home. I would follow carefully, with a sense of satisfaction and fulfillment, atop the Honda and likely in a position I may never see again. The Yamaha was on the road with me following behind, crying out to rather be riding than following her, no matter how attractive a sight it truly is. We will get to this new home, but first the past must be acknowledged a final time, and a glance upon where all my spare parts, as well as homely belongs will themselves call home, for a short while. Most of my belongings will live in storage while I decide my next path, be it renting or purchasing, either dictated in large part to my summer and possibly continuing employment after, for now this works effectively.


From here, we, both myself and the bike, will call our destination home once again, and the final destination for this machine might finally be around the corner, only time will truly know for certain of this painstakingly long awaited occurrence.
Continue below,