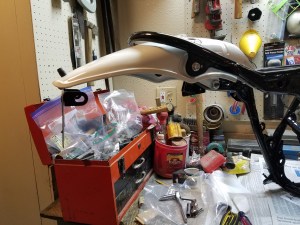
As mentioned earlier, it turned out to be a good thing that the oil cooler mount ended up working the way it did. In the advent of mounting up the front fender there was an interference issue between the two, the solution was to move the cooler further back by reducing the mount. While on oil, this is not an advertisement per se, but this will be the lubrication of choice.


A gallery of a couple different things, my favorite being the transformation of the seat pan. I had previously talked with a Don of Mr. Eds Moto about my hopes for a custom seat. Upon bringing in the pan he was reassuring that the metal hooks could be removed and staples would work. A subsequent cleaning, priming, and coating then ensued. The difference should speak for itself, and is yet another detail that adds to the overall excess in fit and finish. Also included are a few more purchases and small tasks still needing completion.
An unfortunate reality would come here. I was hopeful that an assortment of original bracketry, nuts and bolts would be able to be nickel plated, but a local source was very honest about the likelihood of a high quality result. The fix would be powder coating of course, which should prove to fit along with everything else in the end. There certainly is no need to do so, as even a raw polished part would never pit deep enough to cause an actual concern, but I am desperate to make the finished product last for quite some time without too much routine attention.


An enticing delivery is now upon us all the way from Florida, Pro Bolt USA. If you need about any artistic fastener for any mechanical project, they will likely have it in droves. Specializing in aluminum, stainless steel, and titanium fasteners, each with a plethora of colors to choose from for the most part. Depending on what product type and material you need, it can be quite pricey indeed, but not all products are. I did order more than was required for a few items, but a precise listing of parts you need from exact measurements is fairly easy if you take some time, and you can always order more if need be.
The application of some of the previous. The sprocket nuts are titanium and drilled for lockwire, a securing device that has drawn my attention for some time, this being my first interaction. Else, just visual reassurance of some ideas.
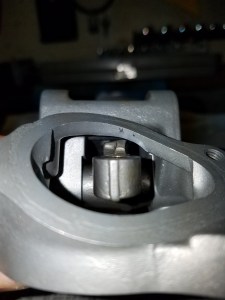
There is a fair amount of random design/engineering features that follow, so mostly only those who have similar interests will likely be entertained. For other readers, fantastically rewarding pictures lie just below and I wouldn’t feel loss if you went to go find them. For those continuing from here, there will be a focus on checking the rotating assembly in whole, or at least the crankshaft and camshaft together, finishing the intake assembly, and various mechanical nuances. Starting the discussion, the TDC window will need to be painted as polishing wasn’t fully rewarding. Bringing the piece up to temperature, I boiled it in water myself, this will allow you to more easily remove the glass sight, but be cautious as it appears to be brass, thus it is rather soft. Next, LED bulbs for our indicators, a happy purchase of many from SuperBright LEDS over the years. The case is back from the machine shop where the crank bearings were pressed in, and holes were drilled in the sprocket cover. While not knowing from the onset, others have had issues blowing the output seal here for multitudes of reasons, and even Yamaha did resolve this in later models with a retainer ring. Being unable to find such a retainer, it was chosen to use bolts and overhanging washers as a remedy, simple enough. The last items from the shop as well, a throat adapter on the carb, and cam bearings pressed in their final resting place, hopefully. A needless picture of engine paint and assembly lube will finish this gallery. I’ve previously used VHT engine enamels and was willing to give Duplicolor a try to see if similar applications provided different results.


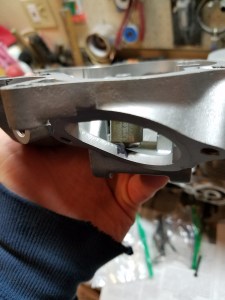
Digging deeper into the internals there is now a byproduct to the crank stroking, piston skirt exposure. The actual installed piston skirt depth is the same as stock, and getting truly custom pistons could alleviate this, but a chamfer to the cylinder wall should suffice. Next, a thorough investigation of installed valve spring heights and clearances, and with luck all is accounted for at the moment, no need to display exacting specifics as they are present with any new spring set. What was a true roadblock, however, was the combination of our 49mm oversized intake valve, along with a huge duration, huge overlapping cam. With a marked 102 degree lobe centers perhaps this shouldn’t come as a surprise being a possibility to occur. To account for this, an application of math was in due necessity. To still have close enough installed spring heights, along with supplied spacers, at max there was roughly .060” that each valve could sink into the head to separate away at TDC. Knowing there is probably an easier method to accomplish, in practice imagine two triangles along the face of each valve. Using geometry all angles can be determined, and in effect both hypotenuses can be moved away from each other in a perpendicular path, or up the valve stem for those that understand. The needed reduction to allow for theoretically at least .040” valve clearance at TDC would be .060” and .050” intake and exhaust, which will be seen shortly. Finishing here, we have perhaps the most interesting images, an unfathomably large velocity stack. Actual filter media footprint for this sized motor need be closer to 14 square inches, we will be crushing that and only utilizing a fraction of filter media. Though, this is really more of a design choice because of the look that it provides, and effectiveness at filling a void left from the air box assembly. Also, a secondary mounting support for all of the intake system through the frame.


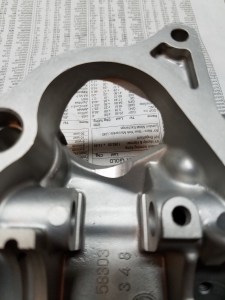
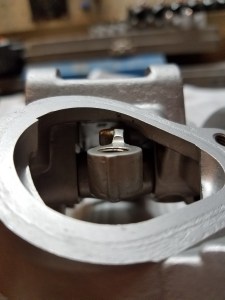
Minor clearancing for the intake rocker arm with the valve seat reduction. While there was .100” to begin with, just another reassurance to account for, and I don’t have comparisons to a stock XT500 cover if there is any difference in webbing here, I would suppose not.
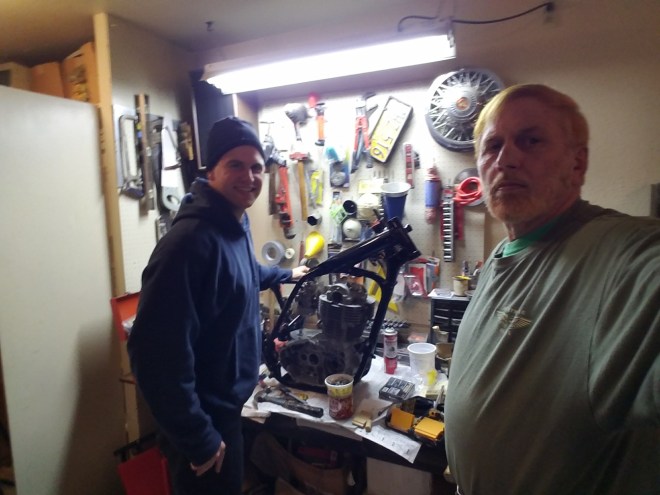
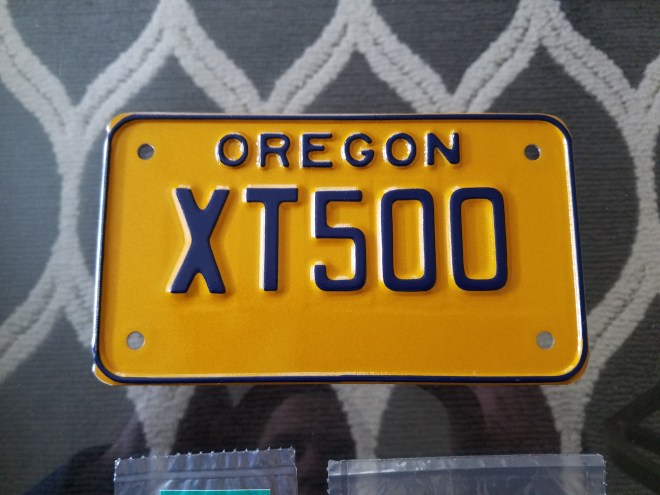
A small change now. You have previously seen me the author of all this in the first video, as well as the site itself. I’m not one to take a selfie, though I can allow the original owner of this machine and my father to do just that, the undeniable source of my desire to tinker with many things. So, pictures of actual people for once, and we shall add many at the end.
A brief pause from actual work back to more deliveries. Most of these are self explanatory, though the spacers and bolts are worth mentioning. Together, these will account for the mounting discrepancy with the swingarm shock mounts. As previously mentioned, the swingarm places the shocks too close together, bringing them so far past perpendicular that the bushings were binding past any reasonable level. So, spacers to move them out much closer to perpendicular, and bolts long enough to do so, A-4 grade stainless as well.


The product of the valve seat reduction. You can see to a degree how far in the valves really are now, and yes further blending needs to occur to finish, during the porting process for later. The actual minimal clearance is just above .050”, allowable so long as the springs control everything as they should, fingers crossed.


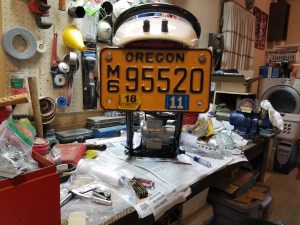
Moving forward with more purchases, mostly cosmetic and electrical, and an idea for how to visually work on the tail of the bike. With the electrical, a slim taillight to mount in a void just under the fender, and yes it will leave a small visual spectrum for other motorists, I feel confident they will hear me instead if this is to be an issue. Also, a simple wiring harness to mate the LED taillight to the harness, license plate illumination bolts, and a nifty taillight controller with multiple strobe functions in an effort to gain all visibility we can out of our taillight. Various jets for tuning down the road also, and yet we may need more still when the time comes.
Another round of fabrication, first with an example of the air filter mounted, and the earlier made plates to be worked on as result of this fitment. While there was an interference from the filter and electrical plate, there is some added custom charm in having it sit though, instead of just cutting the plate throughout. Also, the mounting of the oil separator, a very sturdy mounting base and allows for adjustment during assembly for full swingarm compression.


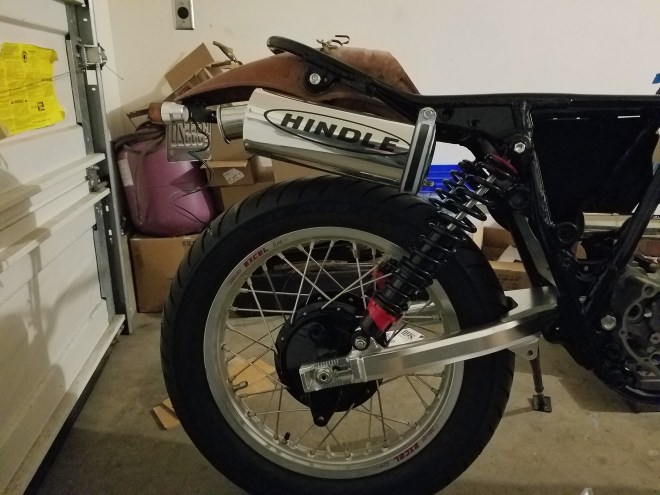
The first manifestation of the tailsection, to some degree at least. Here you can see the attempt to use existing mounts in the fender with a practically designed license plate mount. This mount has the added benefit in having indicator mounts, with the only issue being the mounting angle, which with an application of heat and force bent nicely to perpendicular with the ground. Also, the silencer installed, or mocked up rather. From the purchase, it was known that this would be shortened to a more usable length, while hopefully serving its sound deadening duties, well maybe not so much so.
Small gallery with minuscule work, just further documentation. Dismantling of the original footpegs as we will be using the foot bases’ themselves, needed small items, and parts sent off to powdercoating yet again, and still not the last either.


A daunting, frigid, exhausting day in the garage to complete an essential process to any engine build, it is time to degree the cam. This will be my first time in practice, so this will account for much of the difficulty and time exertion, as can be any learning process. This learning process being an applied and very costly process if passed briefly, or unattempted altogether. Multiple cam timings, setting of the dial indicator, torquing of the head and subsequent rotations and noting all timings thus ensued, all the while claying the combustion chamber at each timing no less. In short, the cam itself was 8 degrees advanced from advertised, and has less than .030” intake valve clearance, which unquestionably will not work. In hopes of having a very aggressive, or temperamental engine, something most actually don’t want, I’ll be happy to retard the cam regardless, making better use at higher rpm, and somewhat doggish and possibly safer at most riding speeds, for remember I claim to be timid. So, at true 3 or 6 degrees retardation there was more than adequate piston to valve clearances, minimal .080” and .100” intake/exhaust.
A small gallery again, and the last before another milestone will visually excite us. Here, the mounting of the new handlebars shows the incompatibility with the cross brace and steering damper. Scotts themselves do sell a curved support that is a full curvature from mount to mount, though only along with a paired set of bars. Another application of heat and force can yield the same result, and is shown as such. Else, small purchases to include spacers for the license plate mount and engine internals.
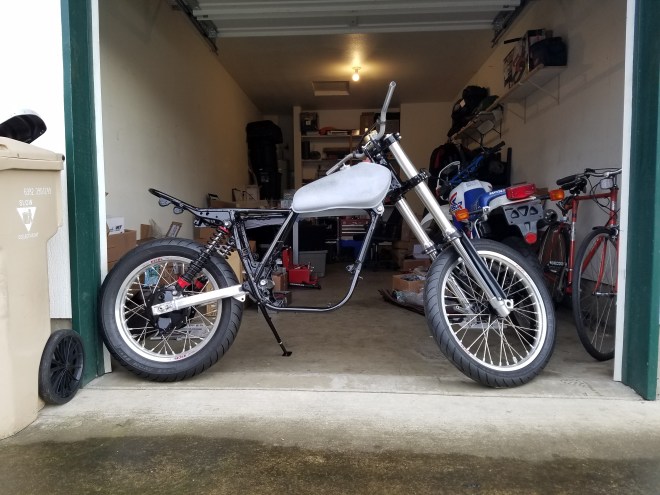
For those who elected to move past all of the previous mechanical intricacies, a gracious welcome to you, the rest of us continue along seeing the fruits of laborious efforts. This is the first creation of fit and finish, the first rolling assembly of the new iteration of this machine. Although hard for me to express my vision, one can fall back to the first sources of inspiration to have some guidance. I’ll admit that at this raw, unfinished stage the overall form is one that is suited far from paved earth, though it will come in time to be just that. For those that might understand, admire this as it is, and for the type of art that this machine has become through every stage.

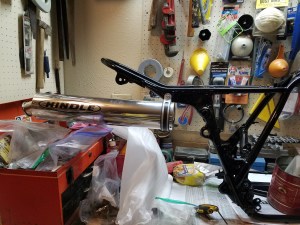
Fear not, for there is another updated version of that form to come soon, though for now more fabrication. In preparation to have the exhaust finished by having a midpipe custom made, as well as getting the tank painted up in Portland, there are required actions. First, the mudguard needs to have a though area for the pipe, and the silencer needs to be shortened. Although the finished guard contains exactly what I was wanting, it was not without effort. A cutoff wheel, file, and enough time to carefully apply these imprecise means was intimidating, I wasn’t about to destroy all the previous work in this plate here. Along with that and part of the exhaust was the silencer. You can see the inner construction, much like any other slip on, and with enough care and a thorough polish none would ever know, except all of us of course. More oil too, for break in when the time comes.


The idea for how and where to hang the silencer can now be seen. The combination of the silencer and license plate fills the void from fender to wheel nicely, though it will be seen where the spring preload will be set. Also, though it will be tight to make a midpipe to suit with only just over 2” from silencer to shock, it can be done. At this point the entire roller will be transported in the back of my truck, slightly disassembled, only to be assembled after having made it to Portland and Bridge City Cycles.
The bike will return shortly, in a very agreed time frame, and worth the wait. Otherwise, we have more small purchases and other parts to receive. First, new Irridium spark plugs, with heat ranges to tinker with if need be. Oil filters, a new top end gasket to account for our torqued mockup, and another order of bolts, here replacing aluminum with stainless steel for various torqued and stress area fasteners.


Another batch of goodness from Partzilla. Here was the first attempt at a non black finish, instead a chrome like one. Sure, I might have still wanted the nickel like mirror, but I know this will last much longer and looks just as sharp. Past this, more new parts, the only one worth mentioning being a capacitor, Lucas Type 2MC, looking to be high quality.
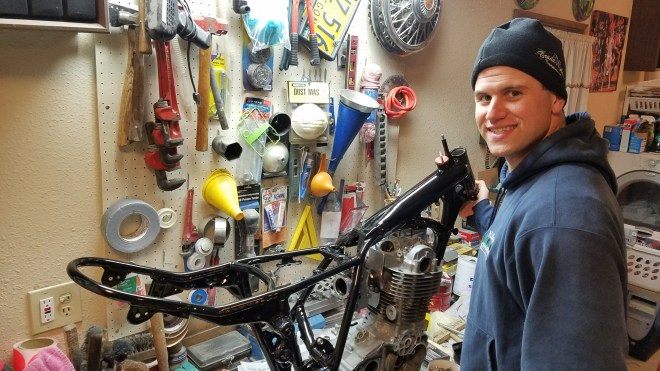
A true necessity of self indulgence here. You’ll know for sure if its me that you’re about to approach, feel free to extend a salutation.
After a short adventure doing a lifting session elsewhere in Portland, it was now time to get at least one of two projects back from BCC. You can see just how much room was available, and what was done to make it all work. It does exactly as it needs to, and with a polishing will be ready for installation, or at least the shelf for a short while.
Various assembly to be shown here. Footpegs are now complete, as well as the kickstart, and both are a stunning transformation of the same metal that lies underneath. The vin decal has been mounted, and mounting of the steering damper, but now with stylish and contrasting cup washers and hopeful to use these where appropriate elsewhere.


A much dreaded project, labeling of the entire wiring harness and all accompanying devices that need to use it. Thankfully, Rexs makes each harness as stock for various years, and all colors are correct. This provided harness also contains extra ground terminals, which will come in handy to mate with the indicators if so chosen. Along with that fact, countless wiring diagrams are available and a patient individual should be able to finish in a few hours while making notes on all extra aspects yet further needed, of which there are more than a dozen after simply plug and go in this case. Finishing with electrical, more mounting of various pieces, and the determination of where to place the ignition key as the steering damper wouldn’t allow it to lie in the stock mounting position, so on the downtube it will now reside.


The warmest day of the year has now exposed itself to us, a perfect chance to start and finish the painting of most engine components. With the completion of this, at least assembly of the bottom end can occur while desperately awaiting completion on head porting. Once these tasks are complete, the engine will reside in whole where it belongs, long awaited during the entire process. On paint, proper masking, application, curing, and polishing provided fair results, better than my previous uses I’ll claim. Also here, the steering lock assembly once again resides where it should, but with an added touch of luster, and new internal case bearings installed.


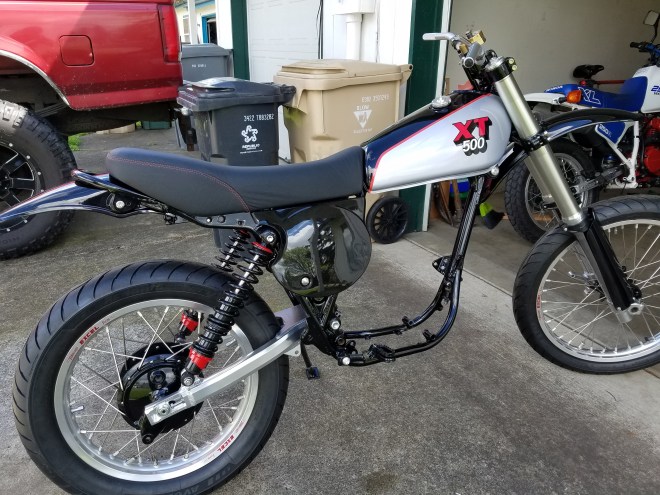
Turn now to a more typical Northwestern weekend, a deluge of droplets falling with excessive force from blanketing dark gray skies. Though, this is all with a sense of excitement and joy, for it was time to receive the freshly painted tank. After a drive of much hydroplaning and good music, we have what appears to be an as stock theme replication. This is mostly true, following post 1981 models and thus never occurring on this early model tank. Also, great care was taken to place the pinstipe in a fashion that continues the concept of the frame extending though the tank, which can be seen and understood in the next images.


Continue below,